Digital Fabrication Challenge — Crossbow
Self-directed build · Laser cut and 3D printed only · Fasteners and string excepted
The challenge. Design and build a fully functional crossbow where every component is either laser cut or 3D printed. No purchased parts except fasteners, the string, and the bolts. A self-imposed constraint with no client and no deadline — the point was to find out where the limits of the two processes actually are when you can’t reach for a machined part to solve a problem.
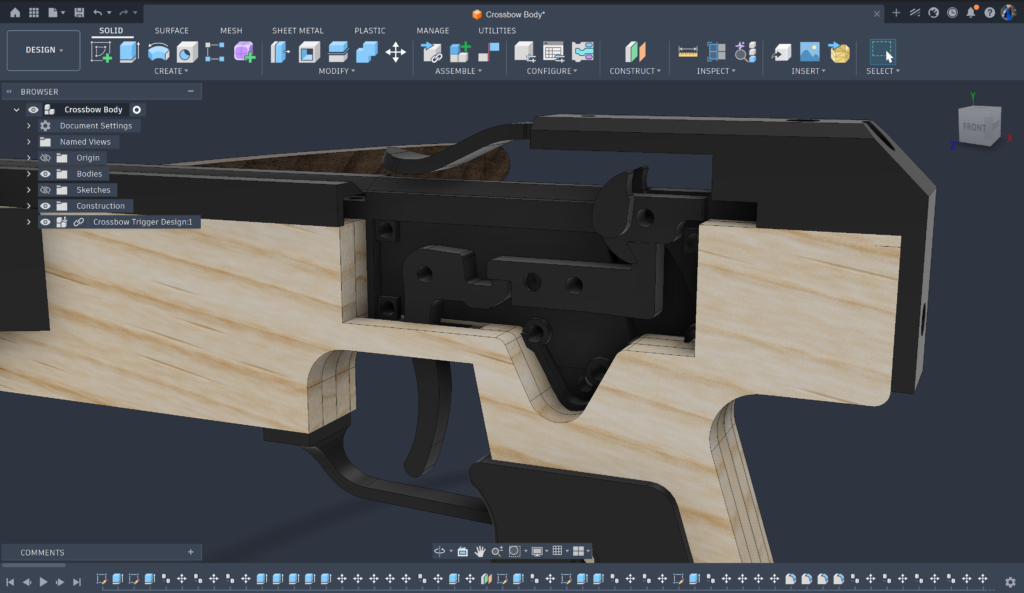
Start with the hard part. The build began with the trigger, not the body. The trigger mechanism is the component with the least dimensional freedom — everything else has to be designed around where it sits and how tall it is. Three release approaches were sketched and compared before committing; the one chosen was the most mechanically complex of the three, because the simpler options traded away control and reset behavior.
That mechanism was then built and tested in isolation on a laser-cut test frame that mimicked the eventual geometry, loaded with springs to simulate string tension. Validating the subassembly before designing anything around it meant the failures that followed were cheap.
What the prototypes found. Several things only surface once parts exist. Printed screw bosses came out undersized from thermal shrinkage and had to be resized. A lobe on one part was binding against a slanted face and preventing full travel. Another component was rubbing on a screw hole and had to have material relieved. Most importantly, an early revision could release without the trigger being pulled — a locking geometry problem that took two rounds of modification to eliminate.
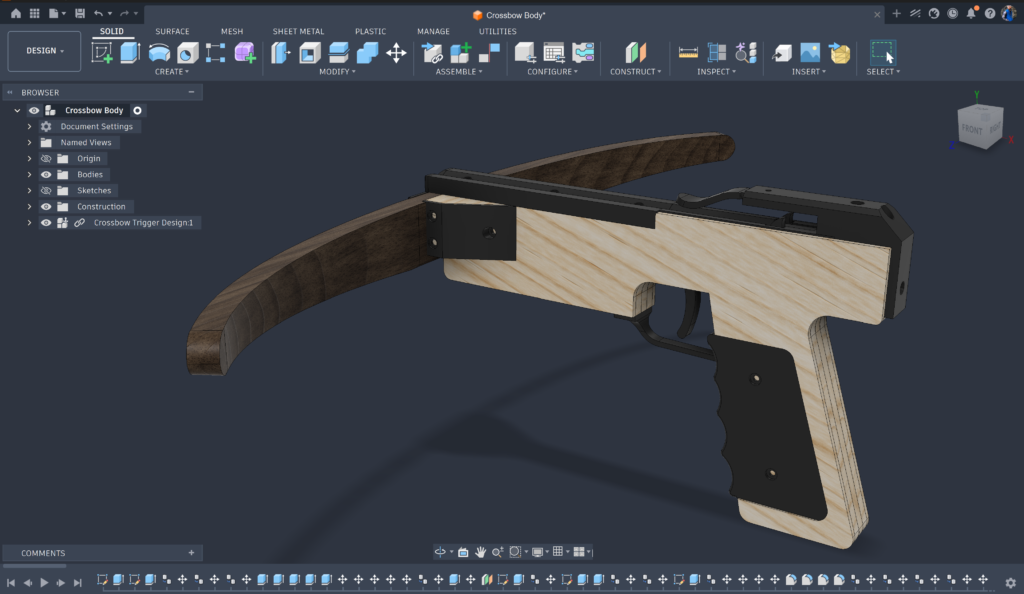
Two design changes worth naming. The original enclosure was a three-piece assembly with a separate top rail. That was consolidated into a single integrated shell — fewer parts, faster print, less hardware, simpler assembly. Separately, the pivot screws used during prototyping were replaced with cut brass pins, sized to sit flush with the housing walls. That wasn’t cosmetic: flush pins meant the body didn’t need clearance pockets cut for protruding screw heads, which removed work from every part downstream.
The limbs, three times. The first limb was laminated oak, shaped, and failed under string tension. The second, ash, was reshaped to leave more material in the failure zone and shortened to reduce draw — and failed as well.
The root cause wasn’t the shaping. It was a mismatch: an off-the-shelf crossbow string has almost no stretch, so a laminated wood limb absorbed loading the material couldn’t take. The fix changed both sides of the equation — Baltic birch plywood laminate paired with nylon cord, which has enough give to soften the load.
Three laminate configurations were built and compared: four layers of 1/8″ with alternating grain, a mixed 1/8″ and 1/4″ stack, and two layers of 1/4″ running with the limb. The four-layer 1/8″ alternating-grain lay-up won. More laminations meant less strain carried by any single layer and more glue lines distributing it, while alternating the grain kept any one orientation from becoming the weak axis. The thicker two-ply version was stiffer but concentrated bending stress in fewer, thicker plies — and stiffness was never the problem. Surviving the draw was.
The body. A five-layer laminated frame, laser cut and glued. The three inner layers are thicker stock and the two outer layers thinner, which keeps the frame rigid without making the grip uncomfortably wide — a stack-up chosen for hand feel and stiffness at the same time.
The limb-mount block includes a detail worth pointing out: an internal T-shaped void behind the mounting face. The limbs attach with screws, and screw holes in plywood eventually wear out. The void gives access to install a bolt and nut from behind once they do. It’s a repair path designed in before the first failure, on a part that hadn’t failed yet.
One honest exception. The limbs were finish-shaped with a router and template. Once laminated, they were too thick to cut on the laser. The constraint held everywhere else in the build.
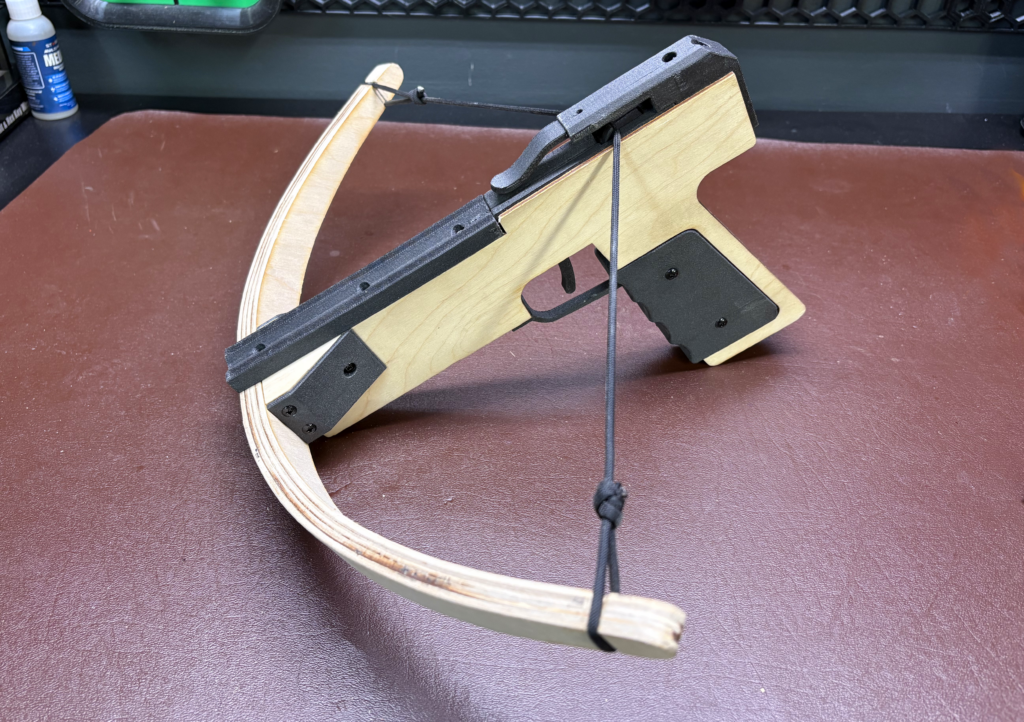
Result. A fully assembled, functioning crossbow, accurate enough for target shooting, built almost entirely from two digital fabrication processes.
Processes and methods
| Fabrication | Laser cutting, FDM 3D printing |
| Design | Fusion 360, full assembly modeling |
| Materials | Baltic birch plywood (4-layer, 1/8″, alternating grain), PETG-CF, plywood frame |
| Methods | Subassembly test rigs, iterative prototyping, laminate lay-up, jig and form making |
| Bought parts | Fasteners, string, bolts |
| Part count | 20 |
| Timeline | 3 weeks |
Capabilities shown: mechanism design · iterative prototyping · design for manufacture and assembly · failure analysis and root cause · material selection under constraint · CAD-to-physical validation · design for serviceability
 Request a Quote